
Last modified on: 22 Oct 2026

Learning how to make a challenge coin is straightforward once you understand the steps involved. The process begins with an idea, develops through artwork and customization, and concludes with professional manufacturing. From choosing the right concept and materials to approving the design and producing the finished coin, this guide walks you through the complete challenge coin creation process.
Whether you're creating a coin for a military unit, first responder organization, company, or special event, understanding the manufacturing process helps you make informed decisions about your design. Before getting started, you can explore the different types of custom challenge coins to find inspiration for your project, or review our challenge coin customization options to compare metal finishes, shapes, edge treatments, and specialty features. These resources complement the step-by-step instructions below and can help you determine which design elements best represent your organization or occasion.
Custom challenge coins are typically manufactured through die striking or die casting, depending on their materials, shape, and design requirements. The process involves preparing production tooling, forming the coin, refining its surface, and applying plating, enamel colors, or specialty finishes. Each coin then undergoes quality inspection before packaging and delivery.
The manufacturing method depends on the complexity of the artwork and the physical specifications of the coin. Traditional die-struck coins are often made from brass, while larger custom-shaped designs or coins with extensive cutouts may be produced using die-cast zinc alloys. Both methods allow manufacturers to reproduce custom artwork consistently, although each offers different design capabilities.
This step-by-step custom coin guide explains how to create a custom coin, from the initial concept to the finished product. Although challenge coins may appear simple, producing a high-quality coin involves careful planning, precise artwork, specialized equipment, and multiple finishing stages. Understanding the complete process helps you select appropriate design features, communicate your expectations, and avoid unnecessary changes after production begins.
Every great challenge coin begins with a clear purpose. Before developing artwork or selecting materials, determine why the coin is being created and who will receive it. Challenge coins are commonly used to recognize achievements, commemorate important events, celebrate organizational milestones, strengthen team identity, and honor service. Establishing the coin's purpose early helps guide every design decision and ensures the finished product communicates a meaningful message.
For example, a military unit might create a coin to represent its mission, commemorate a deployment, or recognize exceptional service. A fire department may design a coin featuring its department emblem and anniversary date, while a company might use challenge coins to acknowledge employee accomplishments or organizational milestones. Each situation requires a different approach to imagery, wording, and presentation.
Consider what the recipient should remember when holding the finished coin. The strongest concepts often connect an organization's identity, shared experience, or important achievement with recognizable imagery that reinforces the purpose behind the design.
Understanding how to design a custom challenge coin begins with translating your concept into artwork suitable for manufacturing. You don't need professional design experience to get started. Many customers begin with a simple sketch, existing logo, photograph, insignia, or written description of their idea. A professional design team can use these materials to develop a digital concept that reflects the intended message and works within the physical limitations of a metal coin.
The front and back of the coin provide opportunities to communicate different elements of the design. One side might feature an organization's primary emblem, while the reverse displays a commemorative date, motto, achievement, or additional illustration. The artwork should have a clear visual focal point, with supporting details arranged to create balance rather than overcrowding the available space.
One of the most important challenge coin design tips is to consider how the artwork will appear at its actual size. Fine lettering, tightly spaced lines, and complicated illustrations may become difficult to recognize when reproduced on metal. Using readable fonts, recognizable imagery, and appropriate spacing helps ensure the finished coin communicates its message clearly.
After developing the artwork, select the specifications that determine the coin's size, shape, appearance, and texture. Traditional round challenge coins remain popular, but custom-shaped designs offer opportunities to represent an organization or event through the coin's physical outline. Sizes also vary, with larger coins providing more room for detailed imagery and lettering, while smaller coins may be more practical for everyday carrying.
Metal and plating choices have a significant influence on the finished appearance. Polished gold, silver, copper, and nickel finishes create bright reflective surfaces, while antique finishes emphasize recessed details and provide a more traditional look. Color can be incorporated through enamel, allowing logos, emblems, and other design elements to stand out against the surrounding metal.
Soft enamel produces a textured surface with recessed color fills, while hard enamel creates a smoother, polished appearance. Die-struck coins emphasize raised and recessed metal without relying on extensive color, making them appropriate for classic designs that highlight texture and detail.
For unique custom challenge coins, specialty options can introduce additional depth, movement, or functionality. Cutouts create open spaces within the design, 3D artwork adds sculpted dimension, and spinner coins incorporate moving components. Specialty edges, engraved numbering, bottle opener features, and unusual silhouettes can further personalize a design when they complement its intended purpose.
You can compare these approaches through our challenge coin styles collection, which includes examples of spinner coins, custom shapes, 3D coins, and specialty designs. For additional inspiration, our custom-shaped challenge coins showcase distinctive designs based on vehicles, buildings, insignias, and other recognizable objects.
Customization choices also affect production costs, particularly when a design includes larger dimensions or specialized features. Our guide to custom challenge coin costs explains how quantity, materials, and upgrades can influence pricing, helping you balance your design preferences with your budget.
Before manufacturing begins, the design is prepared as a digital proof showing the artwork, colors, lettering, and selected customization features. This allows you to review the proposed appearance and request any necessary revisions before the manufacturer begins creating the molds.
Carefully check organization names, dates, ranks, mottos, insignias, and other identifying details. Pay attention to the size and placement of lettering, color selections, and how the designs on the front and back work together. For military units, government agencies, and other organizations using official symbols, verifying the accuracy and authorized use of insignias is particularly important.
The proofing stage is also an opportunity to evaluate whether the design feels balanced and readable. If the artwork appears overcrowded or important elements are difficult to distinguish, adjustments can be made before approval. Once the artwork and specifications are finalized, the project can move into production.
Once the digital design has been approved, the next stage involves creating the custom molds used to manufacture the challenge coin. These molds are developed from the finalized artwork and contain the detailed impressions needed to reproduce the lettering, imagery, and raised or recessed design elements on the finished metal surface. The accuracy of the molds plays an important role in determining the quality and consistency of the completed coins.
Using specialized computer equipment, manufacturers create precision molds based on the approved design. The mold-making process also accounts for important features such as the coin's shape, dimensional artwork, and other structural details.
Once completed, the molds are inspected to ensure they accurately represent the approved artwork and meet the requirements of the selected production method. These molds are then used to reproduce the coin's design consistently throughout the manufacturing order, creating the foundation for the remaining production stages.
After the molds are prepared, the manufacturer begins forming the physical coins. The production method depends on the design's specifications, materials, shape, and complexity. Traditional die-struck challenge coins are produced by applying significant pressure to metal blanks, transferring the artwork from the dies onto the surface. This process creates the raised and recessed details that give many challenge coins their recognizable appearance.
Die casting uses a different process in which molten metal is introduced into a mold to form the desired shape and design. This method may be appropriate for coins with complex silhouettes, extensive cutouts, or other features that are difficult to achieve through traditional striking.
Both approaches allow manufacturers to reproduce custom artwork across multiple coins while maintaining consistency. The selected method should support the design's intended appearance, ensuring that lettering, dimensional elements, and decorative details are accurately transferred into the finished metal pieces.
Once the coins have been formed, they undergo surface preparation to remove manufacturing imperfections and prepare them for plating and other finishes. Depending on the production method, this may involve trimming excess material, smoothing rough edges, removing burrs, and polishing selected areas of the metal. These steps refine the coin's texture and help establish the contrast between different parts of the artwork.
Manufacturers may use polishing, sandblasting, brushing, or other techniques to achieve the desired appearance. Polished areas create reflective highlights, while sandblasted or textured surfaces offer a more subdued finish. Combining these treatments can help lettering, emblems, and dimensional artwork stand out more clearly.
Specialty edge treatments may also be incorporated according to the approved specifications. Rope, chain, spur, beveled, scalloped, and reeded edges can add distinctive texture to the outer perimeter. These details enhance the physical presentation of the coin while contributing to its overall design.
After surface preparation, the coins receive their selected metal plating and decorative finishes. Plating determines much of the finished appearance, with options ranging from polished gold and silver to antique copper, nickel, and other specialty treatments. The appropriate finish depends on the artwork and the level of contrast desired between raised and recessed areas.
If the design includes color, enamel is applied to selected sections. Soft enamel creates a textured appearance because the colored areas sit below the raised metal borders, while hard enamel undergoes additional finishing to produce a smoother surface. For artwork requiring fine details or complex imagery, manufacturers may use printing techniques such as screen printing or UV printing when suitable for the selected coin style.
Specialty features, including glitter enamel, two-tone plating, engraved numbering, and protective coatings, may also be incorporated during the finishing process. Each treatment should enhance the artwork without distracting from its primary message. The result is a coin that combines the selected materials, colors, and decorative details into a cohesive finished design.
Before the completed coins are packaged, they undergo quality inspection to ensure the artwork and manufacturing details meet the approved specifications. Manufacturers check elements such as plating consistency, enamel placement, lettering, surface finishes, and edge treatments. Coins with noticeable imperfections or inconsistencies can be identified before the order is prepared for delivery.
Once inspection is complete, the coins are packaged according to the selected presentation options. Depending on the project, packaging may include protective sleeves, coin capsules, velvet pouches, display cases, or presentation boxes. Appropriate packaging helps protect the finished coins during shipping and can enhance the experience when they are distributed during formal ceremonies, recognition programs, or commemorative events.
From defining the initial concept to receiving the finished product, creating a challenge coin combines thoughtful design with specialized manufacturing. Understanding the process helps you make informed decisions, communicate your expectations, and create a coin that accurately represents the people, achievements, or events it is intended to honor.
Can you make your own coins? Yes, simple coin-like pieces can be created using certain DIY crafting or metalworking techniques, but producing professional-quality metal challenge coins typically requires specialized equipment and manufacturing expertise. Traditional challenge coin production involves creating custom molds, forming the metal, applying finishes, and inspecting the completed pieces to maintain consistent quality.
Working with an experienced manufacturer allows you to develop your own design without needing professional metalworking equipment. You can start with a sketch, logo, photograph, or description of your idea while receiving guidance on artwork, materials, dimensions, and finishing options. This is particularly valuable when a design includes detailed imagery, custom shapes, 3D features, or other specialty elements that require precise manufacturing.
At Custom Challenge Coins, our team can help transform your concept into a professionally manufactured coin that reflects your organization, achievement, or special occasion. Whether you have completed artwork or are starting with a simple idea, you can request a free challenge coin quote to begin the design process.

Join Us!
Buy Sample PacksCopyright © 2026 customchallengecoins.net - a division of MetalPromo

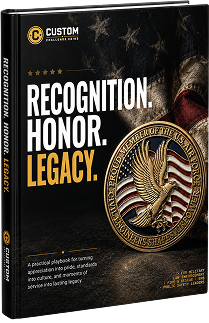






You've taken the first step toward crafting something truly lasting. Whether for your team, your organization, or a milestone that demands recognition, we are here to bring that vision to life.
You're getting this because you engaged with our latest community story. We love seeing the passion behind every request, and we're excited to share our expertise with you.
As promised, here is the document you requested.
Questions? Simply hit reply. Our team is ready to discuss your specific vision and how we can best support your goals through expert craftsmanship.
Stay tuned for more insights, inspiration, and tools for leadership.
Best regards,
The Custom Challenge Coins Team
© 2026 Custom Challenge Coins. All rights reserved.